
Build a content automation workflow for faster product launches (SMB playbook)
Step-by-step guide to build a content automation workflow for SMBs—brief-to-publish product launch SOPs, multi-channel repurposing, HubSpot & WordPress setup.
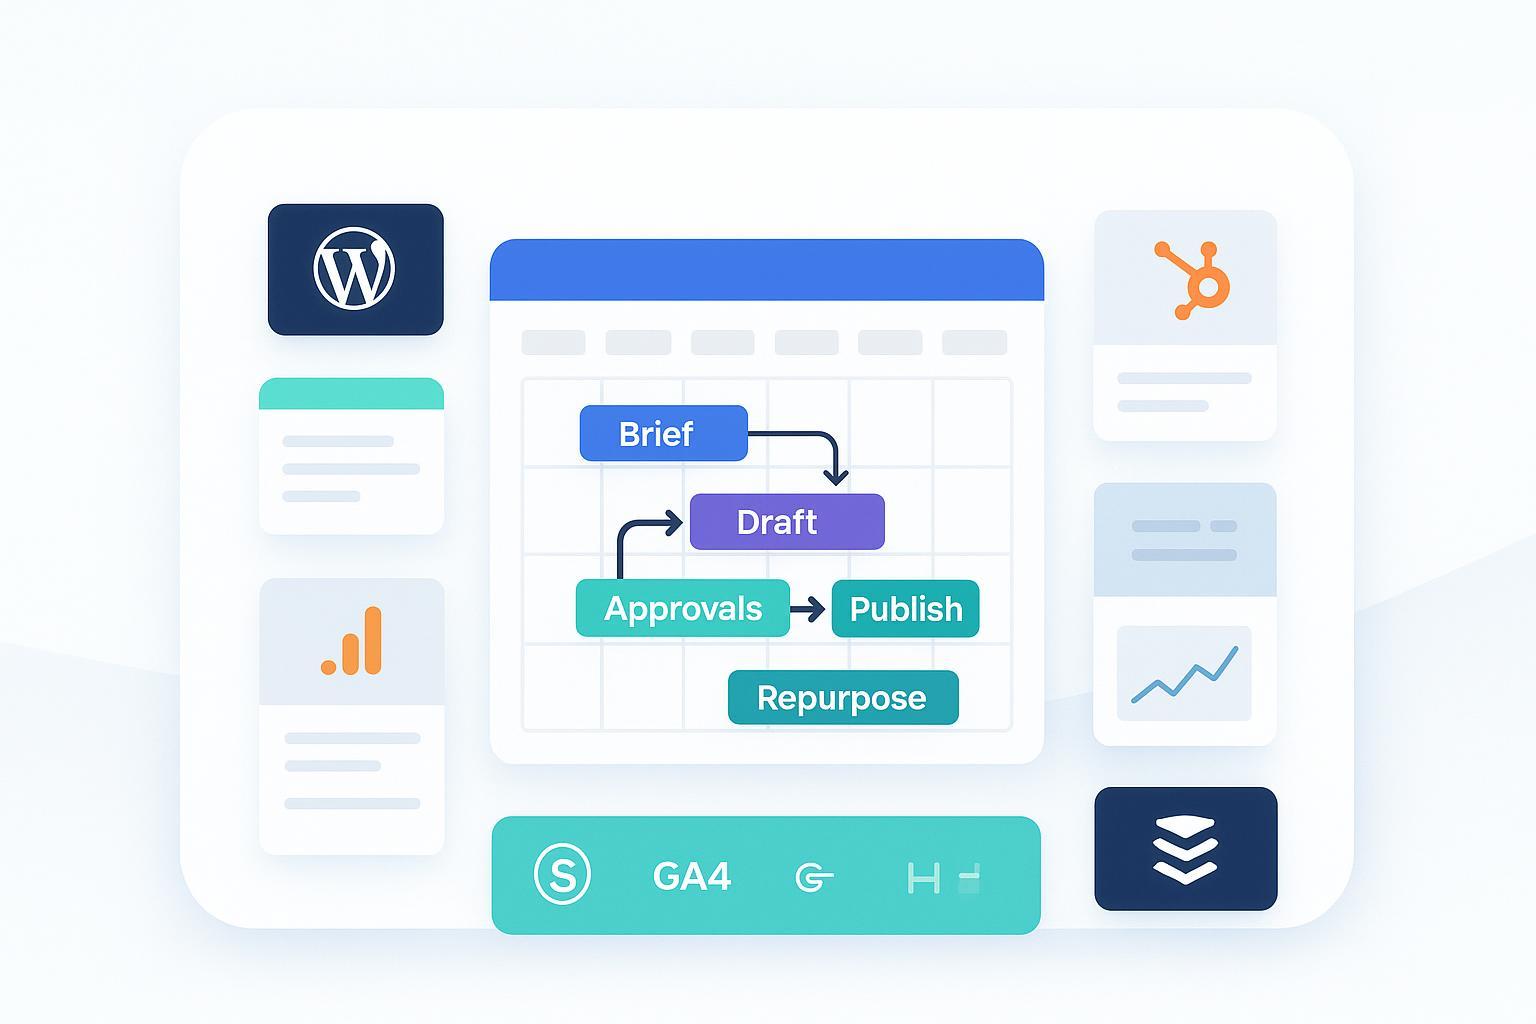
You’ve got a small team, a new product to announce, and not a lot of time. This playbook shows exactly how to build a brief-to-publish content automation workflow—optimized for speed-to-publish—that powers a product launch blitz: one pillar, supporting cluster pages, and a coordinated push across blog, LinkedIn, email, slides, short video, and social. We’ll use WordPress + GA4/GSC + HubSpot + Buffer/Hootsuite, keep governance intact, and make attribution visible.
1) Create the backbone: UTMs and a HubSpot campaign
Before any writing, establish the measurement spine so every asset rolls up to one campaign.
Define a short UTM taxonomy: campaign (e.g., product-launch-blitz), medium (blog/email/social), source (platform), content (asset or variant), term (if paid). For structure and reporting, follow HubSpot’s guidance on tracking and attribution in the official resources like the explanation of UTM codes and campaign attribution models in the HubSpot knowledge base. See the overview in the HubSpot help docs on how to manage and analyze campaign attribution via campaign features: Use campaign attribution reports (HubSpot Knowledge Base).
In HubSpot, create a Campaign and associate future assets (blog, emails, social posts, forms, CTAs). The Campaign details and Attribution tabs will let you view contacts, deals, and revenue influenced. Reference steps in the official docs: Create campaigns using Marketing Studio and Analyze individual campaign performance.
Verification (2 minutes)
Confirm a unique Campaign UTM is visible on the Campaign details page. Reference: Manage your campaign UTM values.
Save your UTM spreadsheet template for reuse.
Why this speeds things up: You won’t retroactively fix UTMs or re-associate assets—both time sinks that delay reporting and post-launch decisions.
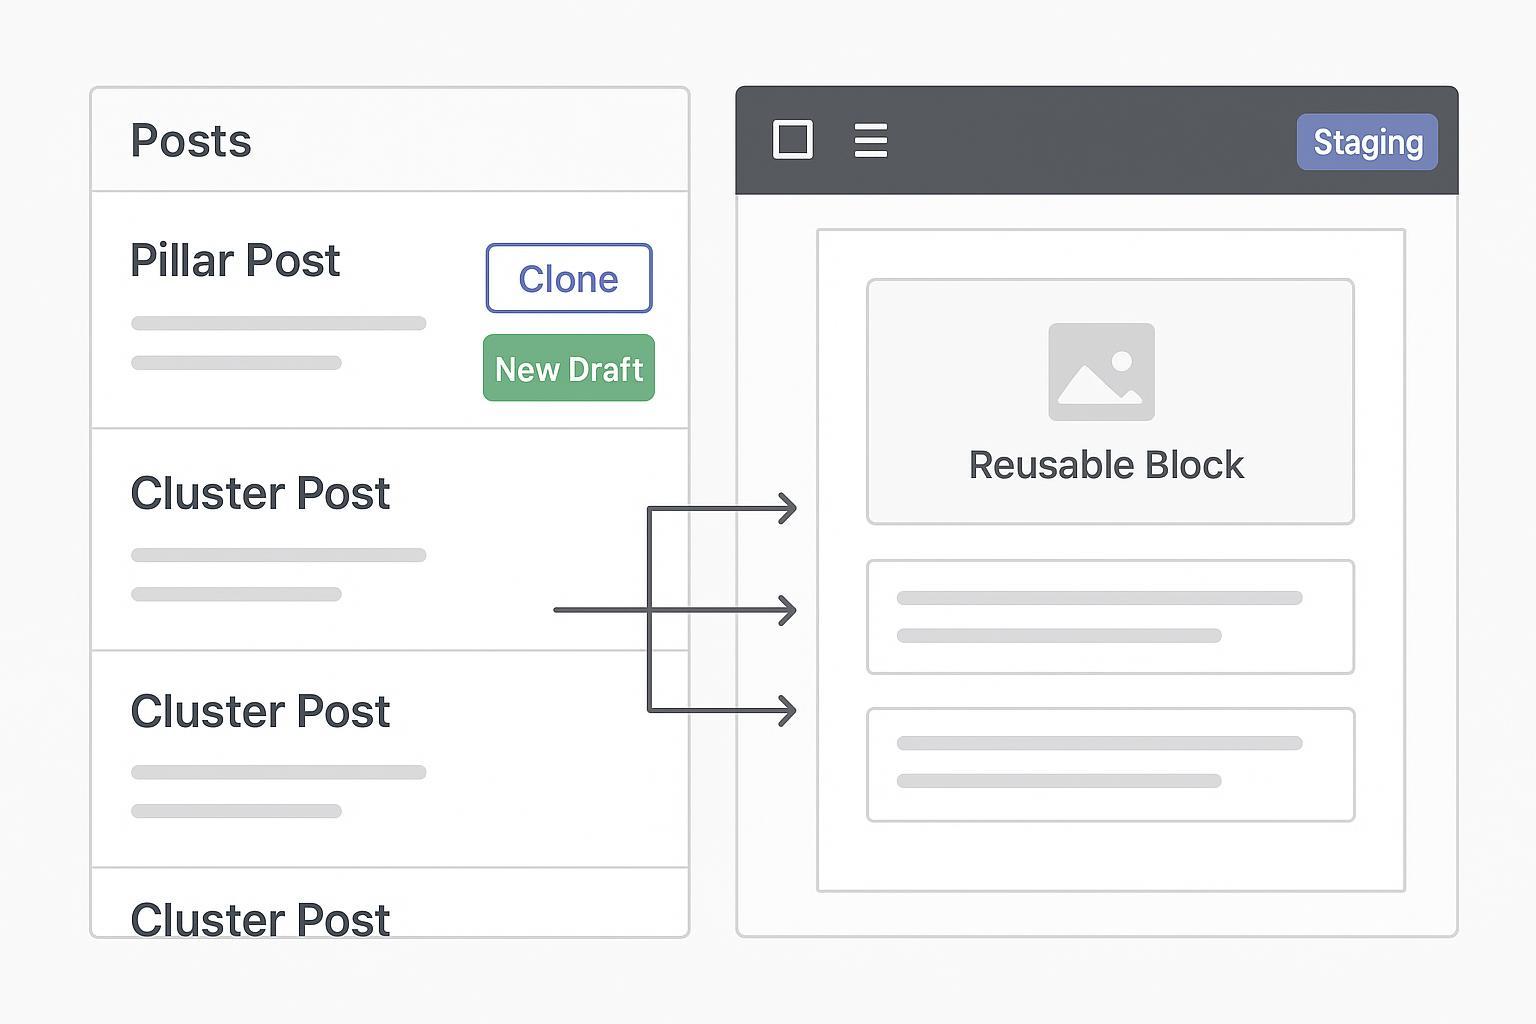
2) Build the pillar and cluster in WordPress—safely and fast
Use templates and safe cloning so you’re not rebuilding layouts from scratch.
Install and use Yoast Duplicate Post to clone a proven template page or post. This preserves taxonomies and custom fields while avoiding live edits. See the official plugin and safe update process: Yoast Duplicate Post (WordPress.org) and Yoast’s Rewrite & Republish.
In Gutenberg, keep reusable blocks for hero, key points, CTA placements, and a references footer. Clone for each cluster page, update the H1/H2s, body copy, and images.
Work on staging, not production. Most managed hosts provide one-click staging and selective push so you can QA before going live; see overviews like What is a staging site (WP Engine).
Internal link map (quick setup)
From the pillar, link to each cluster with descriptive anchors in the body (not just footer nav).
From each cluster, link back to the pillar in the intro paragraph and to at least two sibling clusters where relevant.
Add alt text to all images (action + object), and ensure fast-loading formats.
Verification (5 minutes)
On staging, check mobile/desktop rendering, internal links, and image alt text.
Keep staging noindexed; copy slugs and canonicals from plan to avoid duplicates on go-live.
Speed lever: Duplicate once, edit many. Template-first builds are faster and reduce QA churn.
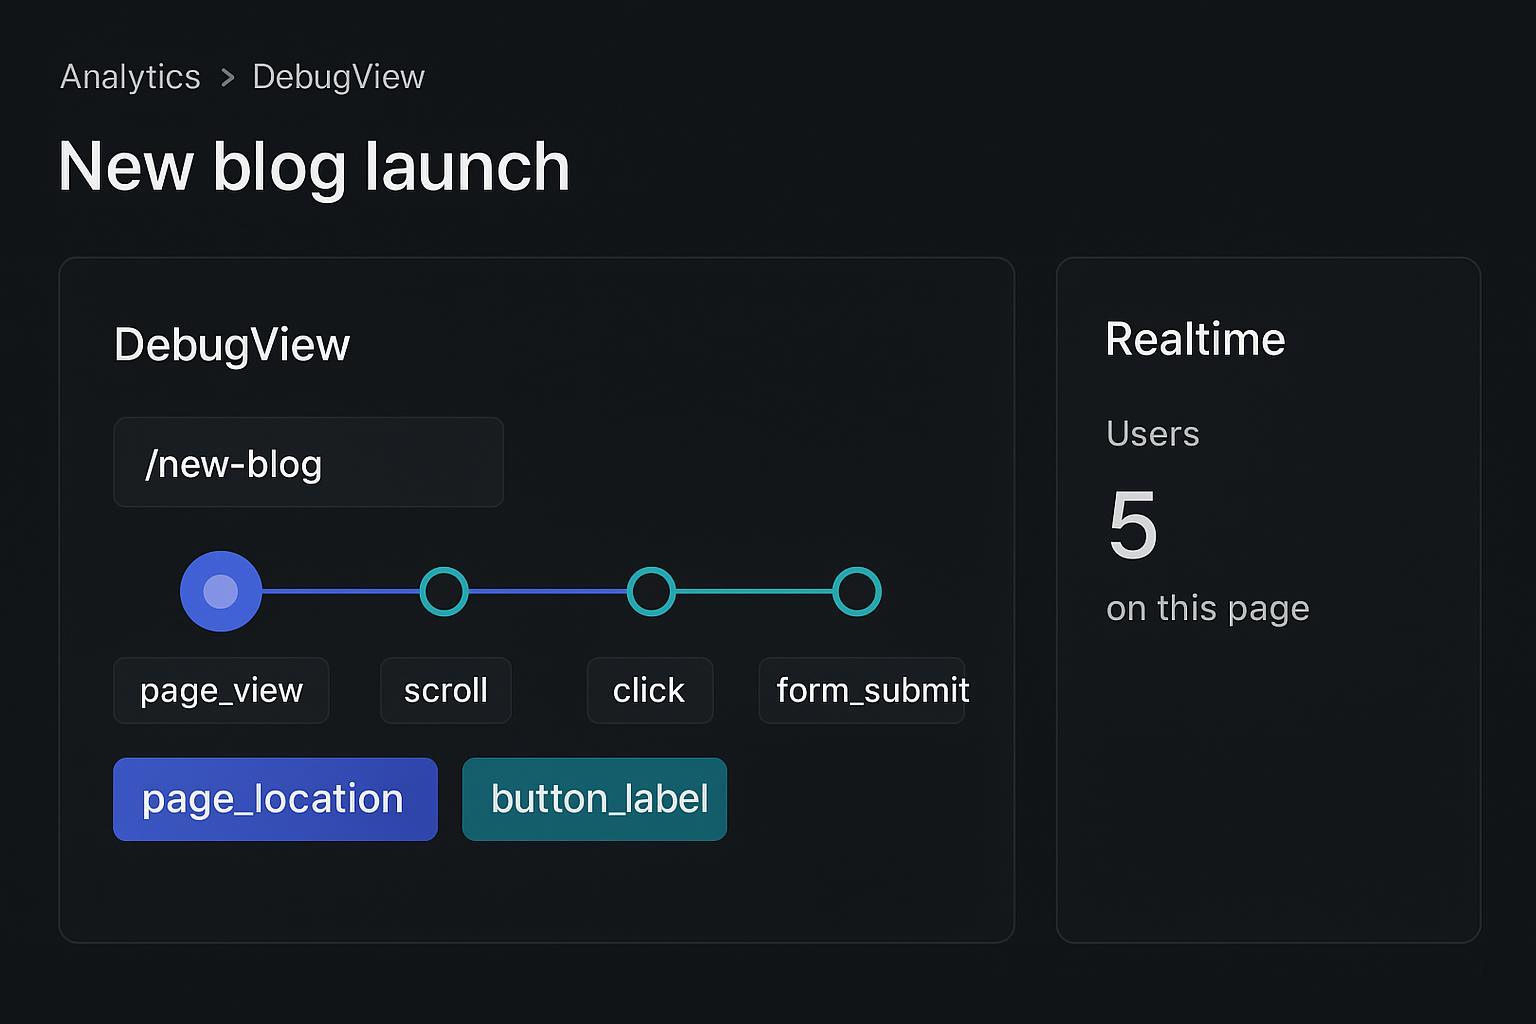
3) Analytics and indexing: validate fast in GA4 and GSC
Immediately after you publish, validate that events and indexing are on track so you can promote confidently.
GA4 DebugView: Trigger
page_view,scroll,click, and anyform_submiton your new pillar. Confirm they appear with correct parameters. See Google’s developer docs for events and validation: Set up events (GA4 Developers) and Verify implementation. For a quick immediate snapshot of live traffic, use the Realtime report.
GSC request indexing: Use URL Inspection to request indexing, confirm sitemap freshness, and monitor Indexing > Pages. For the relationship between Search Console and GA4 in monitoring and debugging, consult Google’s guide: Use Search Console and Google Analytics data for SEO.
Verification (5–10 minutes)
GA4 DebugView shows the expected events and parameters.
Realtime shows sessions on the pillar URL when you visit it.
GSC URL Inspection accepts request; page appears in Indexing > Pages without errors.
4) Repurpose the pillar across channels in 48 hours
Here’s a fast mapping from the blog to your main channels. Use consistent UTMs and associate all derivatives to the same HubSpot Campaign so you can see aggregate impact.
Channel specs and timing (quick reference)
Channel | Format and key constraints | CTA & link placement | Suggested timing |
|---|---|---|---|
LinkedIn post | 1:1 image; hook in first ~180–200 chars; ~3–5 short paragraphs | UTM-tagged link after first line or last line | T+4–8 hours post-publish |
LinkedIn document | 8–12 slides at 1080×1080; big headers, 30–60 words per slide | Link in caption + first comment | T+24–36 hours |
Email (HubSpot) | Subject ≤60 chars; preview ≤90; 1 primary CTA | Link CTA to pillar with UTMs; associate email to Campaign | T+24 hours |
Slides (deck) | 16:9 for web; export a square version for LinkedIn carousel | CTA on final slide; link in description | T+24–48 hours |
Short video | 30–60s; 9:16; captions on; 1–2 takeaways | Link in post text; platform-native upload | T+36–48 hours |
Notes
Platform specs change; verify in platform Help centers before scheduling at scale.
For voice and structural consistency across assets, see this process-focused primer on brand-aligned writing: step-by-step blog writing methodology.
5) Social scheduling and approvals (Buffer/Hootsuite)
Use approvals to cut rework while keeping the queue moving.
In Buffer, create Drafts for each channel and use Approvals so only authorized users move posts to the queue. Configure a posting schedule per channel and use suggested/best times. Official guides: Scheduling posts (Buffer Help) and Saving and scheduling draft posts.

In Hootsuite, teams can request/approve posts from Composer/Plan and use Best Time to Publish. See: Approve posts (Hootsuite Help).
Verification (3 minutes)
All posts are associated with the HubSpot Campaign and include correct UTMs.
One low-visibility channel can be used for a “test post” before the full queue is released.
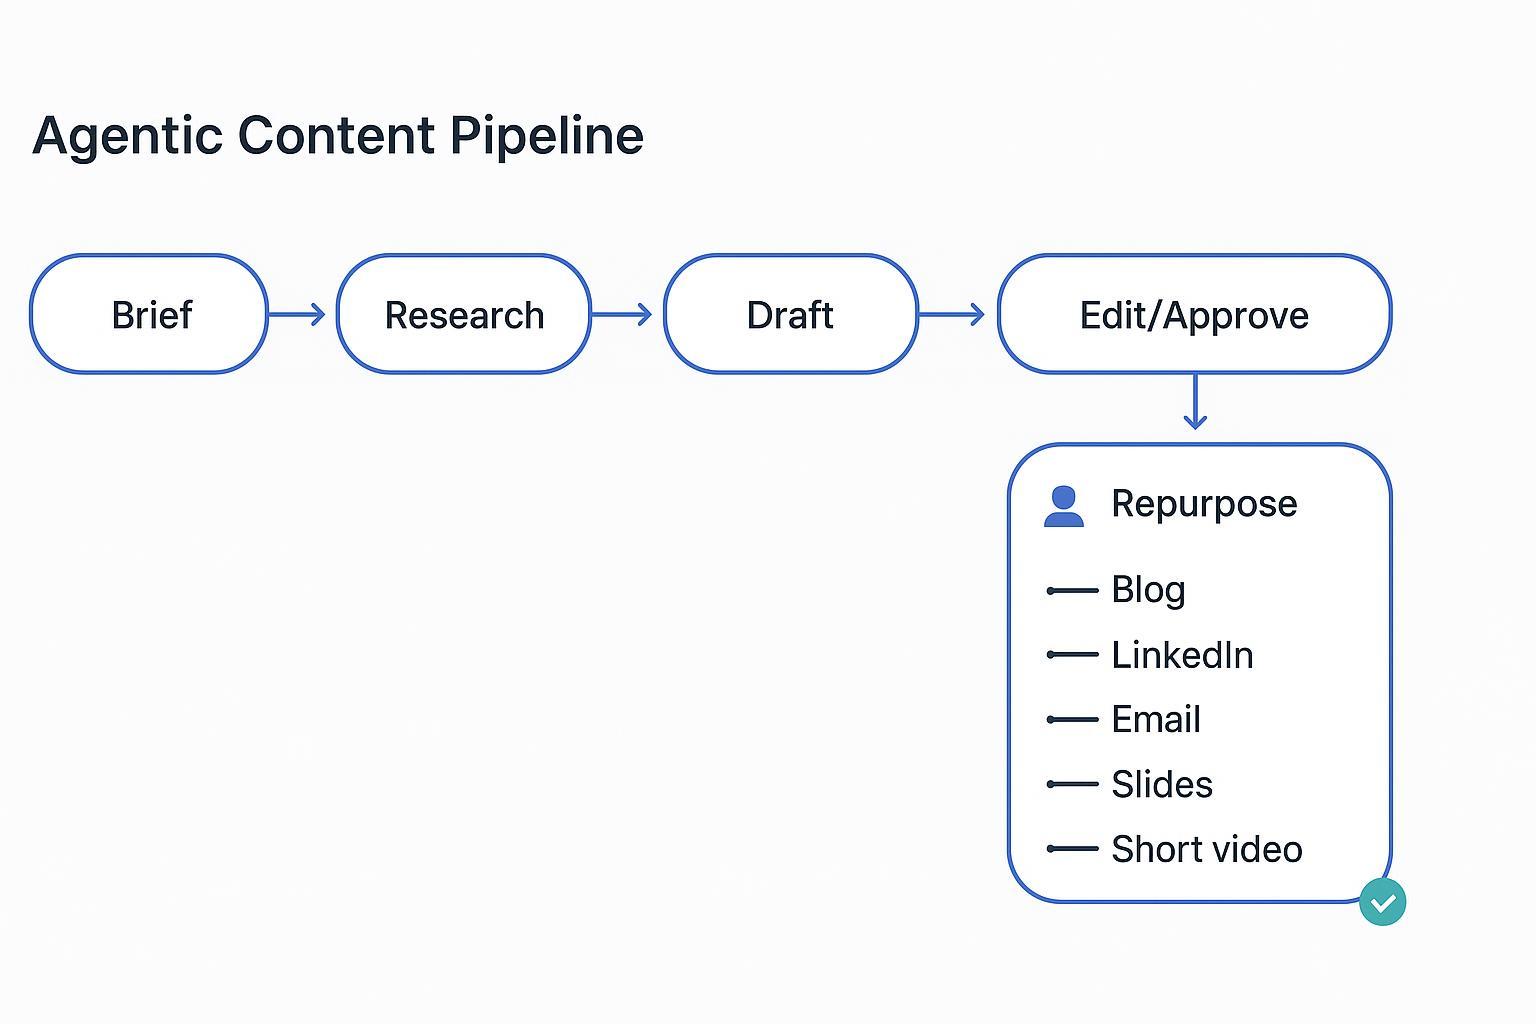
6) Practical example: one agentic pipeline configuration (neutral)
Sometimes it helps to see the flow end to end. Below is a conceptual example of an agent-based pipeline that routes work from brief → research → draft → edit/approve → repurpose → publish & measure with human-in-the-loop checks. Tools vary; this is one way to visualize the flow. For a neutral, real-world platform reference, see QuickCreator, which supports agent pipelines and brand voice governance; apply the same principles to your stack.
Related reading on conversion workflow design (optional): an example of CTA placement logic you can mirror in your CMS/HubSpot setup is outlined here: conversion-focused agent workflow.
7) Launch cadence and measurement
Keep a tight review loop so you can promote winners and iterate laggards quickly.
T+24 hours: Check GA4 Realtime spikes post-social, engagement time on the pillar, and that hub assets (email/social) are attributed in the HubSpot Campaign Attribution tab. For GA4 mechanics, revisit Google’s developer docs on events and validation: Set up events (GA4 Developers).
T+72 hours: In GSC, look for impressions and initial clicks; in HubSpot, verify campaign-influenced contacts. In social, review CTR by variant to decide which snippets to boost.
T+7 days: Expand the cluster with one quick follow-on post based on Search Console queries; consider refreshing images or adding an FAQ block if engagement stalls.
T+28 days: Produce a brief campaign report: sessions, engagement, assisted conversions (GA4), and contacts/deals/revenue influenced (HubSpot). Archive learnings into your brief template.
8) Troubleshooting hotspots and fast fixes
GA4 events missing? Use Tag Assistant Preview to confirm a single GA4 tag fires with the right Measurement ID; ensure consent settings aren’t blocking events; compare parameters in DebugView. See Google’s docs starting with Verify implementation.
Not indexing quickly? Link to the pillar from already-indexed pages, submit via URL Inspection, confirm noindex isn’t set, and let it bake; discovery can take days. For the joint use of GA4 and Search Console, consult Google’s guidance: Use Search Console and Google Analytics data for SEO.
Duplicate SEO issues from cloning? Keep clones in draft until ready; set correct slug/canonical; use Yoast’s Rewrite & Republish for updates. Reference: Rewrite & Republish.
HubSpot attribution gaps? Re-associate assets to the Campaign, standardize UTMs, and confirm Attribution tab filters (date range/model) are correct. Start with: Analyze individual campaign performance.
9) Governance without the drag (keep speed-to-publish high)
Stage gates: brief sign-off, editor pass, compliance pass, and final publish approval. Keep SLAs short (e.g., 12–24 hours) and auto-reassign if breached.
Templates everywhere: brief, outline, on-page SEO checklist, image specs, UTM builder, and repurpose CSV. Pre-approved patterns eliminate redlines.
One calendar: maintain an editorial calendar that shows blog, social, and email in a single view to avoid collisions. For automation and stakeholder mapping ideas, see monday.com’s overview of content marketing automation: Content marketing automation (monday.com).
10) What you’ve built—and how to scale it
You now have a repeatable content automation workflow tuned for speed-to-publish: a measurement-first backbone, template-driven WordPress builds, rapid GA4/GSC validation, disciplined repurposing, approvals-backed scheduling, and an attribution-ready campaign view. Want to expand to more teams or clients? Modularize the steps, keep the calendar shared, and standardize your CSV templates and SLAs. When you’re ready for deeper operational frameworks, this primer on scaled content operations offers patterns you can adapt: content factory best practices.
Here’s the deal: pilot the exact flow on your next launch for 30 days. Measure, tweak, then scale. That’s how speed becomes your default, not your exception.